
At present we’re making DIY rocks! You heard me! We’re making rocks immediately with this enjoyable science exercise. Youngsters of all ages can have enjoyable turning easy aluminum foil into shiny rocks. It’s enjoyable, it’s simple, it’s instructional and will help children dip their toes into the world of geology. You are able to do this enjoyable DIY rock science experiment at dwelling or within the classroom.
DIY Rocks Science Experiment
Youngsters will be capable to discover geology and perceive how rocks are made with this science exercise. Plus, they’ll work on wonderful motor expertise in addition to hand-eye coordination as properly.
A rock is a stable. And there are various kinds of rocks, and each is made otherwise. Metamorphic rocks are rocks which have undergone adjustments. These rocks are typically subjected to very excessive warmth and plenty of strain beneath the Earth’s floor. Which is what we shall be doing immediately, making metamorphic rocks… however with out the warmth!
Enjoyable truth: Marble, slate, gneiss, and schist are all metamorphic rocks!
This publish accommodates affiliate hyperlinks.
Associated: Let’s make some moon rocks!
Provides Wanted For This DIY Rocks Science Experiment
How To Set Up Your DIY Rocks Science Exercise
Step 1
Wad up one piece of your aluminum foil right into a ball. It may be a unfastened ball. Label this aluminum ball “Rock A”.
Step 2
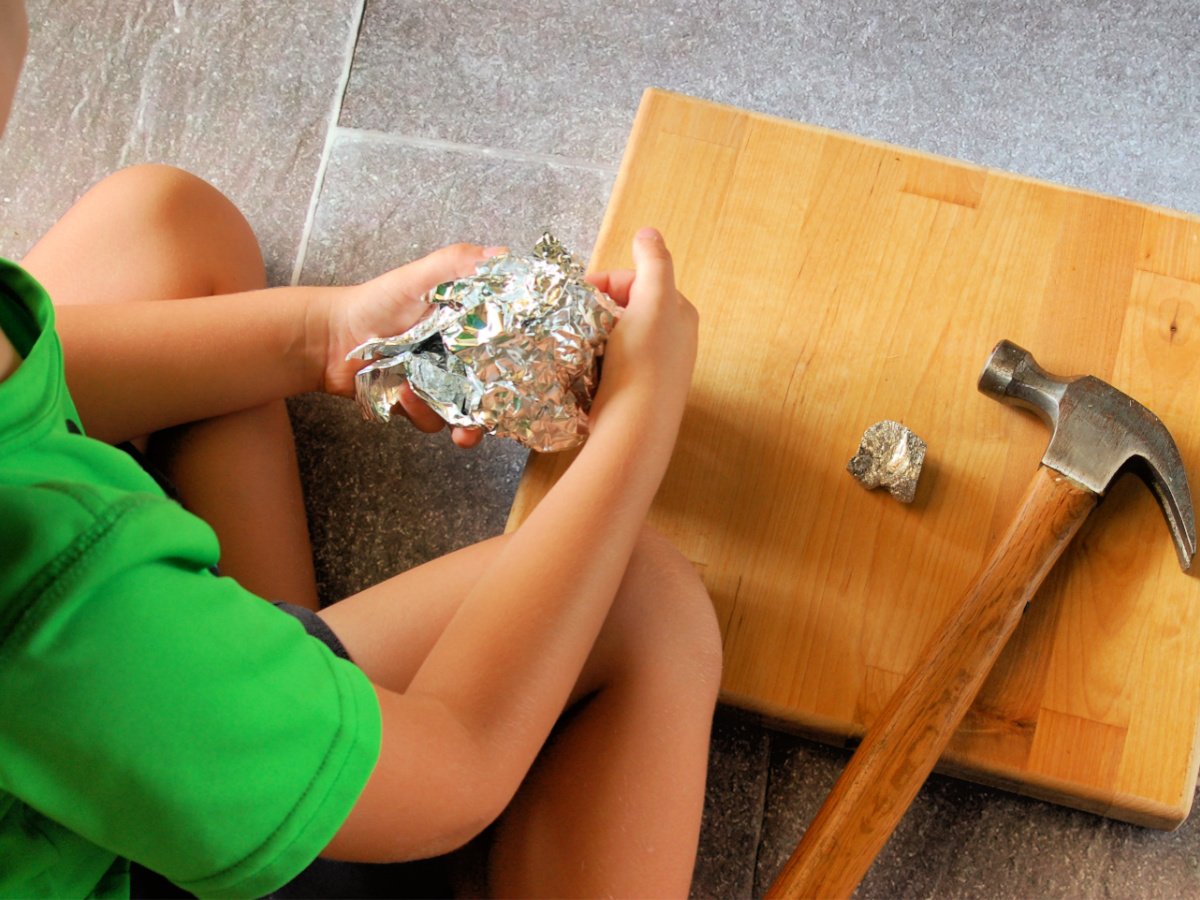
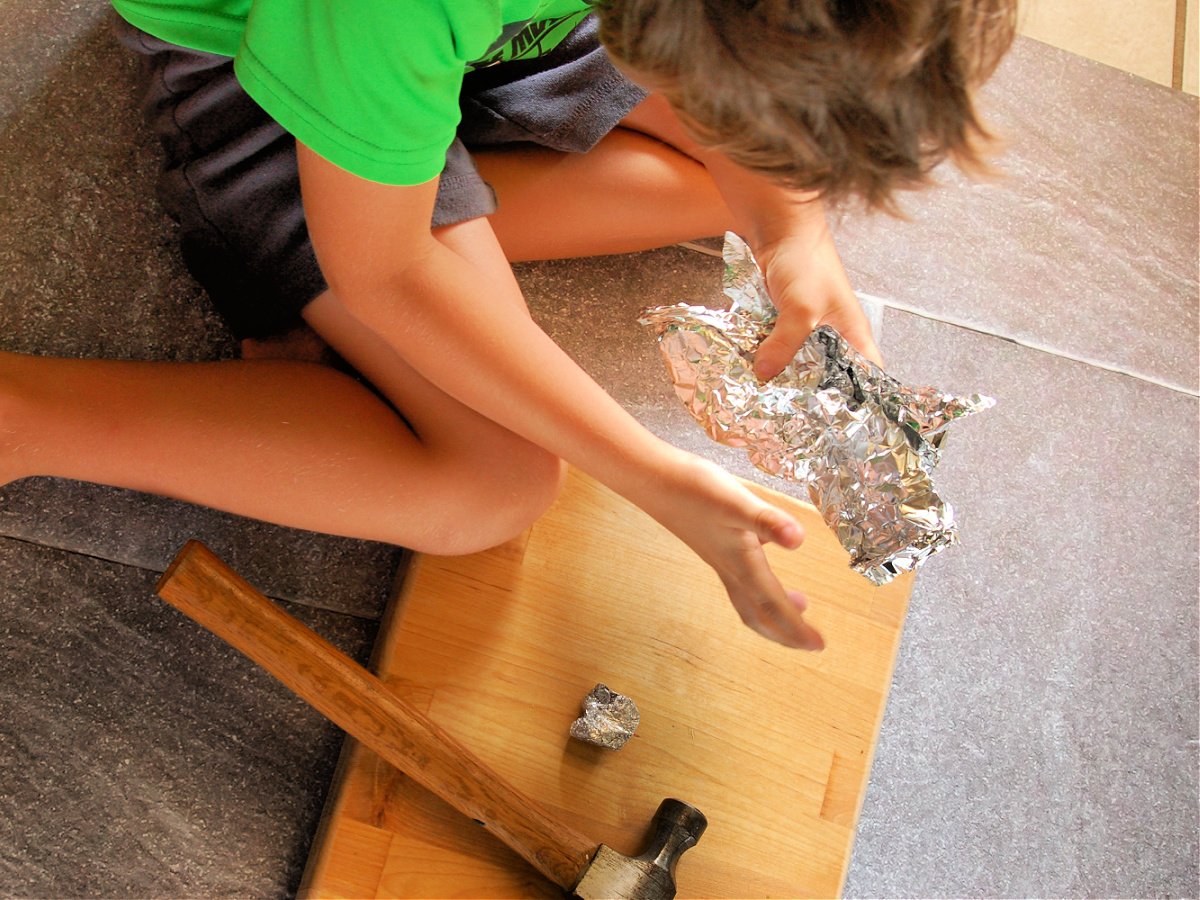
Now, was up the second piece of aluminum foil, like the primary one, and put it on the ground or a tough work floor. Utilizing your palms, push down on it and squish it as arduous as you may! After, label it “Rock B”.
Step 3
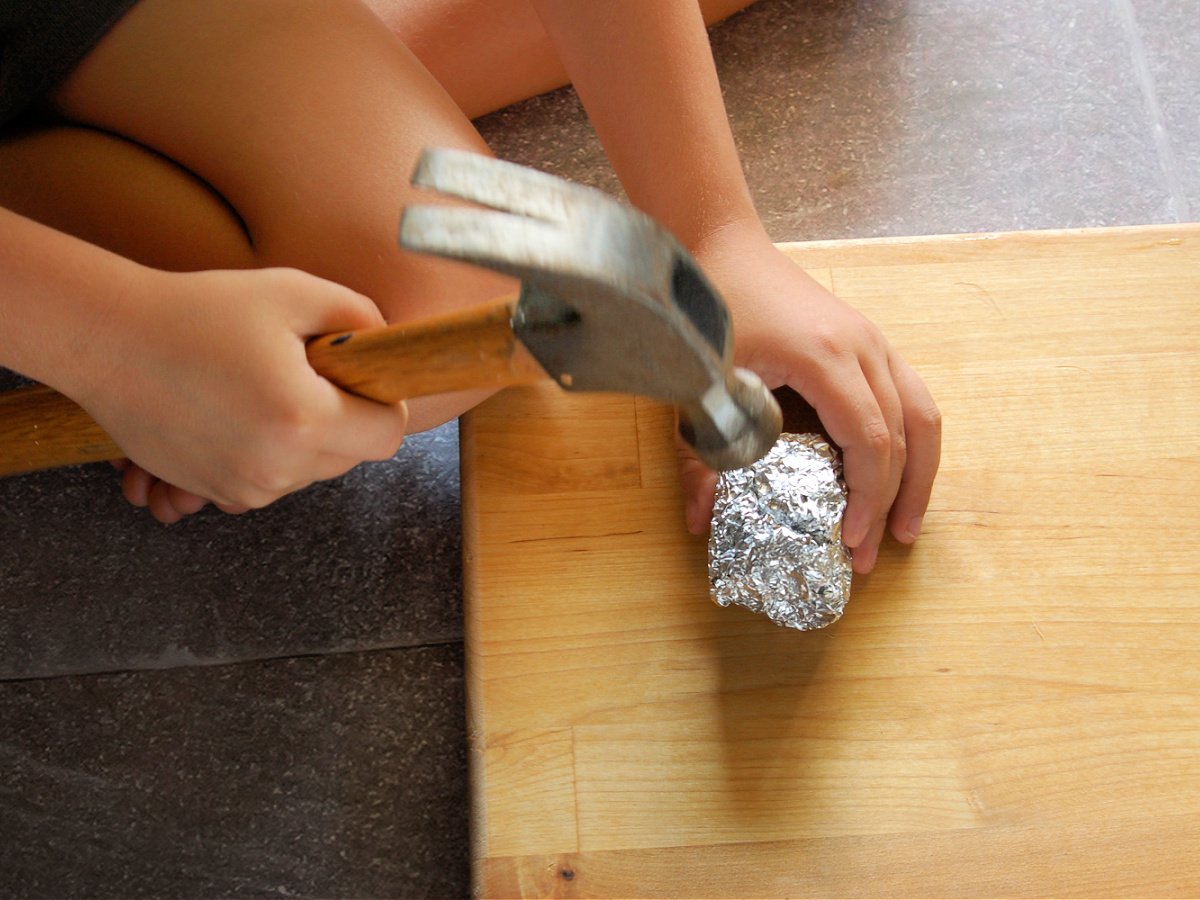
Take your third piece of aluminum foil and roll it right into a ball. Then squish it along with your hand as arduous as you may. Now, put in your security glasses and take your hammer and hammer the aluminum foil till it’s half as thick because it was. Then label it “Rock C”.
Step 4
Take your final piece of aluminum foil and roll it right into a ball. Then squash it along with your palms. Now, take your hammer and whack it! Hold doing it till you smash it fully flat. Label this one “Rock D”.
Craft Notes
If some items come off, that’s okay. It occurs when actual rocks are forming too.
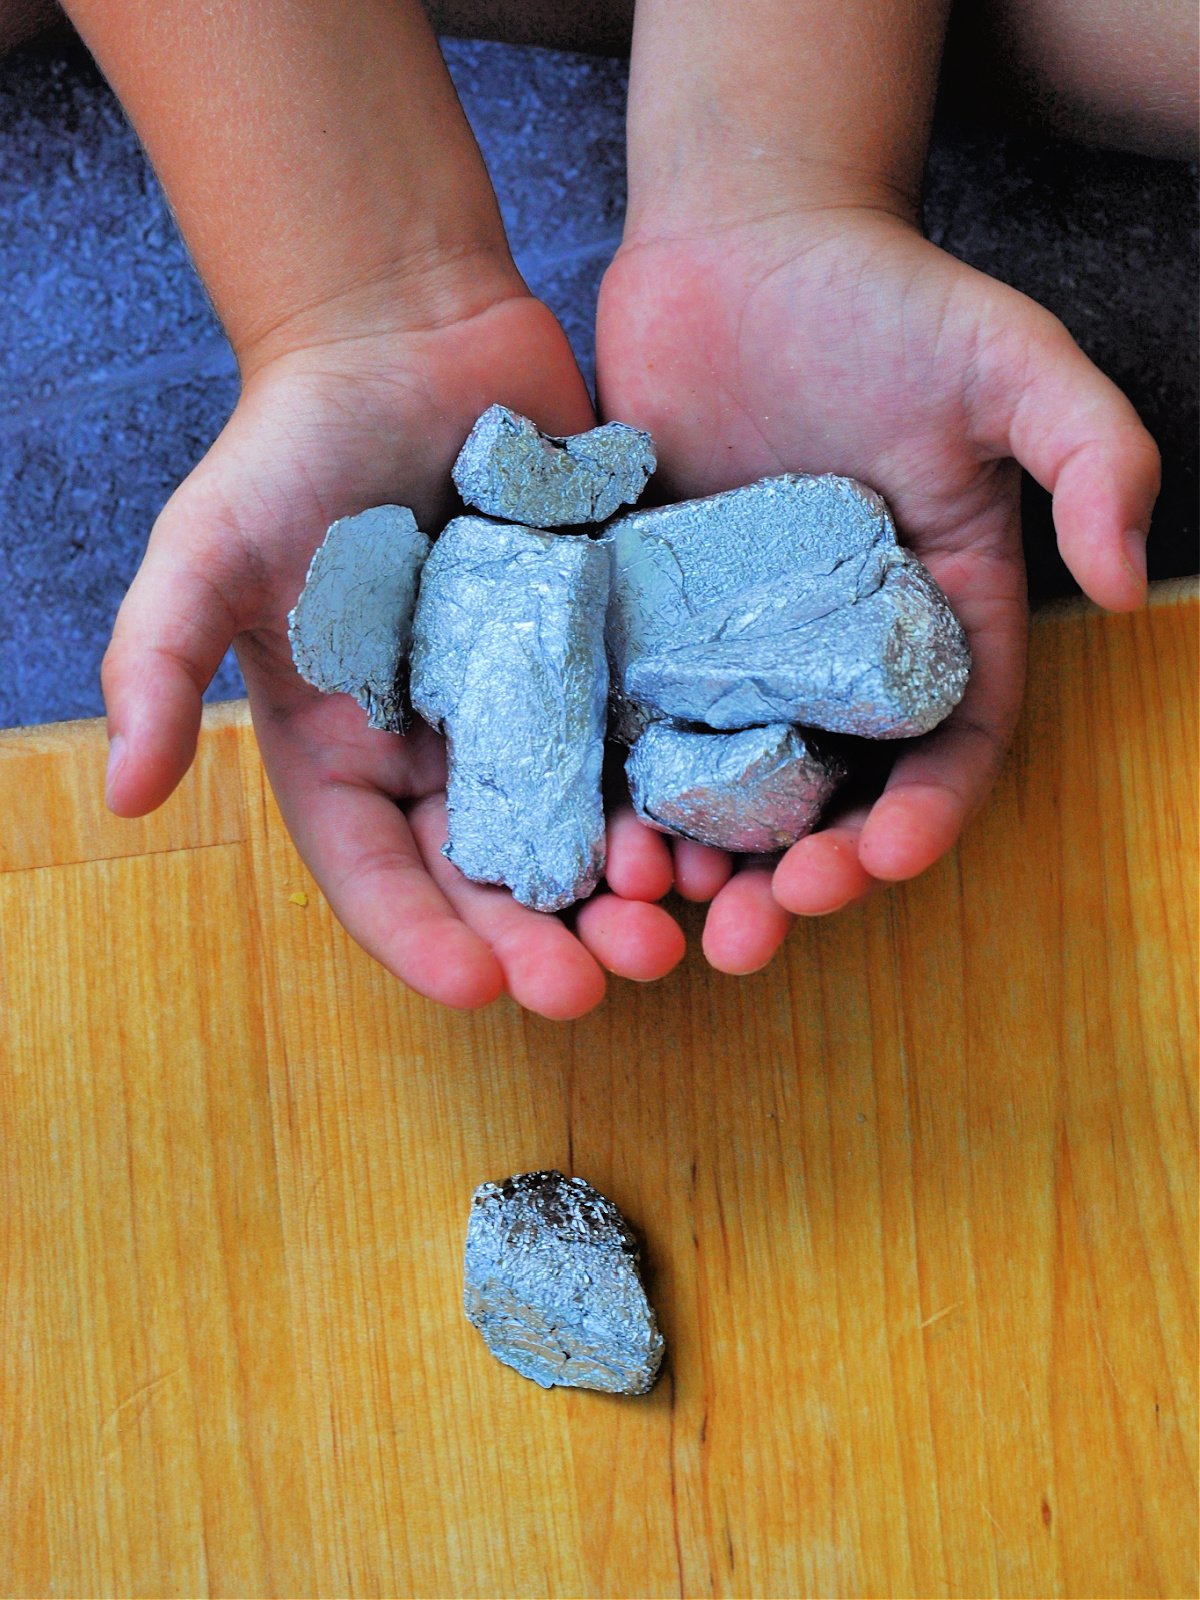
Wanting At Your DIY Rocks
Have a look at your rocks. Have a look at them with simply your eyes after which use the magnifying glass. What do you discover about these DIY rocks? How do they evaluate to actual rocks?
You may most likely see a unique between your fake rocks. Although, they could have similarities to some actual rocks.
Your DIY Rocks Defined
Rock A
You could discover that the aluminum foil has loads of flat surfaces, however they face completely different instructions. That is similar to mudstone and clay. Their particles face completely different instructions identical to your aluminum foil rock.
Rock B
Take the magnifying glass and take a look at this DIY rock. The little flat surfaces are nonetheless dealing with alternative ways, however do you discover that some are beginning to face the identical approach? Rock B is similar to slate. Slate is clay that’s been below strain and has turn into a rock and the particles inside it are lined up alongside the identical aircraft.
Rock C
This rock is most like phyllite. Meaning the floor of your crushed foil is fairly aligned with each other as a substitute of jutting in many alternative instructions like rock a and b.
Rock D
Did any items come off your rock? If that’s the case, then your rock was being sheared. In case you take a look at this DIY rock below the magnifying glass then you definately’ll see that the floor needs to be principally dealing with the identical path, in contrast to rocks a, b, and c. This DIY rock most resembles a rock that is known as schist.
Supplies
- Aluminum Foil (We makes use of items that have been 12×12)
- Security Goggles
- Gloves
- 1 Hammer
- Paper
- Pencil
- Magnifying Glass
Directions
Wad up one piece of your aluminum foil right into a ball. It may be a unfastened ball. Label this aluminum ball “Rock A”.
Now, was up the second piece of aluminum foil, like the primary one, and put it on the ground or a tough work floor. Utilizing your palms, push down on it and squish it as arduous as you may! After, label it “Rock B”.
Take your third piece of aluminum foil and roll it right into a ball. Then squish it along with your hand as arduous as you may. Now, put in your security glasses and take your hammer and hammer the aluminum foil till it’s half as thick because it was. Then label it “Rock C”.
Take your final piece of aluminum foil and roll it right into a ball. Then squash it along with your palms. Now, take your hammer and whack it! Hold doing it till you smash it fully flat. Label this one “Rock D”.
Notes
If some items come off, that’s okay. It occurs when actual rocks are forming too.
Extra Science Enjoyable From Youngsters Actions Weblog
How did your DIY rocks prove?